Heat Pump vs. Furnace: Which One You Should Choose?

Choosing the right heating system for your home can be daunting, especially when considering efficiency, cost, and suitability for your climate. Heat pumps and gas furnaces are two of the most popular options. While both provide warmth, their mechanisms, benefits, and drawbacks differ significantly. This guide will break down the key differences to help you make an informed decision.

Heating systems play a critical role in maintaining indoor comfort, especially during the colder months. Whether you’re upgrading your current system or choosing one for a new home, understanding the technicalities and practicalities of heat pumps and furnaces is essential. This blog delves into their features, pros and cons, and the factors to consider before making a choice.

What is a Heat Pump?

A heat pump is a versatile heating and cooling system that transfers heat rather than generating it. In winter, it extracts heat from the outside air or ground and moves it indoors. During summer, it reverses the process to cool your home. Heat pumps come in three main types:

  • Air-Source Heat Pumps: Use outside air as the heat source. They are the most common and work efficiently in moderate climates.
  • Ground-Source (Geothermal) Heat Pumps: Utilize the stable temperature of the ground. These are more expensive to install but provide exceptional efficiency and long-term savings.
  • Water-Source Heat Pumps: Draw heat from a water source. These are less common and typically used in specific settings, such as near lakes or ponds.

Key features of heat pumps include their dual functionality (heating and cooling), energy efficiency, and adaptability to different climates. They’re an excellent choice for eco-conscious homeowners aiming to reduce their carbon footprint.

What is a Furnace?

A furnace is a traditional heating system that generates heat through combustion or electricity. Gas furnaces are the most common and use natural gas to produce warmth. Furnaces distribute heat throughout the house via ductwork. They are known for their ability to generate high temperatures quickly, making them ideal for colder climates.

Furnaces fall into three categories:

  • Gas Furnaces: Use natural gas or propane. They are efficient and cost-effective for homes with gas connections.
  • Oil Furnaces: Burn oil to generate heat. These are less common today but still used in areas where natural gas is unavailable.
  • Electric Furnaces: Use electricity to produce heat. While they are less efficient and have higher operating costs, they are compact and easy to install.

Furnaces have been a staple in residential heating for decades, offering reliability and simplicity.

Heat Pump vs. Furnace

Here, we’ll compare heat pumps and furnaces based on several factors:

a) Working

  • Heat Pump: Transfers heat between indoors and outdoors using refrigerant cycles. It is a dual-purpose system providing both heating and cooling.
  • Furnace: Burns fuel or uses electricity to generate heat, which is distributed via ducts.
AspectHeat PumpFurnace
Heating MethodTransfers heatGenerates heat
CoolingYesNo
Fuel SourceElectricityGas, oil, or electricity

Heat pumps work by transferring heat from one place to another, making them inherently more efficient in moderate climates. Furnaces, on the other hand, generate heat through combustion or electrical resistance, which can be advantageous in very cold climates.

b) Cost

  • Initial Costs: Heat pumps are generally more expensive upfront, with prices ranging from $4,000 to $8,000, including installation. Gas furnaces cost between $3,000 and $5,500.
  • Operating Costs: Heat pumps are more energy-efficient, resulting in lower monthly bills, especially in mild climates. Furnaces may have higher operating costs depending on fuel prices.

Over a system’s lifespan, operating costs for heat pumps are typically lower due to their energy efficiency. However, the initial investment can be a deciding factor for many homeowners.

Cost CategoryHeat PumpFurnace
InstallationHigherModerate
Operating CostLower in mild climatesHigher, depends on fuel prices

c) Energy Efficiency

  • Heat Pump: Can achieve efficiencies of 300-400% because it transfers heat rather than generating it.
  • Furnace: Gas furnaces typically have an AFUE (Annual Fuel Utilization Efficiency) rating of 78-98%.

Heat pumps shine in terms of energy efficiency, particularly in moderate climates. Furnaces, while less efficient overall, can provide reliable heating during extreme cold snaps where heat pumps may struggle.

MetricHeat PumpGas Furnace
Efficiency (%)Up to 400%78-98%
Best for ClimateMild to moderate wintersCold winters

d) Maintenance

  • Heat Pump: Requires regular cleaning of coils and inspection of refrigerant levels. Maintenance costs average $150-$300 annually.
  • Furnace: Needs annual servicing, including cleaning burners and checking the heat exchanger. Maintenance costs range from $100-$200 per year.

Heat pumps may require slightly more frequent maintenance due to their year-round operation. Furnaces, being single-purpose systems, tend to be simpler to maintain.

e) Lifespan

  • Heat Pump: Typically lasts 10-15 years due to year-round use.
  • Furnace: Can last 15-20 years or more with proper maintenance.

Furnaces often have a longer lifespan, but this is offset by the higher energy efficiency of heat pumps. Homeowners should consider replacement costs and long-term savings when making their decision.

f) Space

  • Heat Pump: Compact units that can be installed indoors or outdoors.
  • Furnace: Requires dedicated indoor space and ductwork.

If space is a constraint, heat pumps may be a better choice due to their compact design and versatility in installation locations.

g) Tax Incentives

  • Heat Pump: Qualifies for federal and state tax incentives due to energy efficiency. Incentives can offset initial costs significantly.
  • Furnace: High-efficiency models may qualify for limited rebates, but not as frequently as heat pumps.

Oil Furnace vs. Heat Pump

  • Efficiency: Heat pumps are more efficient, with COP (Coefficient of Performance) values up to 4. Oil furnaces typically have AFUE ratings of 70-90%.
  • Environmental Impact: Heat pumps are eco-friendlier, using electricity and renewable sources.
  • Cost: Oil furnaces are costlier to operate due to fluctuating oil prices.

Oil furnaces are gradually being phased out in many areas due to environmental concerns, while heat pumps continue to grow in popularity due to their efficiency and adaptability.

Electric Furnace vs. Heat Pump

  • Efficiency: Heat pumps are far more efficient than electric furnaces, which convert electricity directly into heat.
  • Operating Cost: Heat pumps are cheaper to run due to lower electricity consumption.
  • Suitability: Electric furnaces are better for small spaces or as backup systems.

Electric furnaces may be a viable option in specific scenarios, but they are generally outclassed by heat pumps in terms of cost and efficiency.

Heat Pump vs. Furnace – Which is Better for You?

The choice depends on your climate, budget, and energy goals:

  • Mild Climates: Heat pumps are more efficient and cost-effective.
  • Cold Climates: Gas furnaces provide reliable heating.
  • Eco-Friendly Goals: Heat pumps are the greener choice.

Consulting with an HVAC professional can provide insights tailored to your specific situation. Consider factors such as local energy costs, availability of incentives, and long-term savings when making your decision.

FAQs

Can a heat pump replace a furnace? 

Yes, in mild climates, heat pumps can replace furnaces entirely.

Is a gas furnace cheaper to operate than a heat pump? 

In colder climates, gas furnaces can be cheaper to run.

Do heat pumps work in freezing temperatures? 

Modern heat pumps with advanced technology can operate efficiently in sub-zero temperatures.

Which is better for a small home? 

Heat pumps are often better for smaller homes due to their compact design and dual functionality.

How do tax credits work for heat pumps? 

Federal and state incentives can cover a portion of the installation cost, making them more affordable.

How Does a Water Heater Work? Everything You Need to Know

Hot water is an essential part of daily life, whether it’s for a relaxing shower, washing dishes, or doing laundry. A water heater ensures you have a steady supply of hot water when you need it. But have you ever wondered how a water heater actually works? In this blog, we will dive deep into the components, types, and functionality of water heaters. We’ll also explore common reasons for water heater failures and provide answers to frequently asked questions.

Hot Water Heater Components

A water heater is composed of several key components that work together to heat and deliver water efficiently. Here are the main parts:

1) Tank

The tank is a storage vessel that holds water until it is needed. It is usually made of steel and lined with glass or enamel to prevent corrosion. Tanks vary in size, typically ranging from 20 to 80 gallons for residential use.

2) Heating Element or Burner

Electric water heaters use heating elements submerged in the water, while gas water heaters use burners at the base of the tank. Both serve the same purpose: to heat the water inside the tank.

3) Thermostat

The thermostat controls the water temperature, allowing users to adjust it to their preference. Most water heaters keep water at a default temperature of around 120°F, which is both energy-efficient and safe.

4) Dip Tube

The dip tube allows cold water to enter the tank at the bottom, where it is heated. This ensures efficient heating and proper water circulation.

5) Anode Rod

The anode rod is a sacrificial component designed to prevent corrosion in the tank. Made of magnesium or aluminum, it attracts corrosive elements, protecting the tank itself.

6) Pressure Relief Valve

This safety feature releases pressure if it builds up too high inside the tank, preventing potential explosions. Regular testing of this valve is crucial for safety.

How Does a Hot Water Heater Work?

Water heaters operate on straightforward principles, but their efficiency and design can vary depending on the type. Here are the most common types and how they function:

1) Point-of-Use Water Heaters

Point-of-use water heaters are compact devices installed near the location where hot water is needed, such as under a sink. They heat water on demand and are perfect for small spaces or individual applications.

  • Operation: Cold water enters the unit and flows over a heating element. The element heats the water instantly as it passes through, delivering hot water without storage.
  • Advantages: Energy-efficient for localized use and eliminates heat loss from long plumbing runs.
  • Disadvantages: Limited hot water supply, unsuitable for large households.

2) Tankless Water Heaters

Also known as on-demand water heaters, these systems provide hot water as needed without storing it in a tank.

  • Operation: When a hot water tap is turned on, cold water passes through a heat exchanger, which quickly raises the temperature to the desired level using either gas or electricity.
  • Advantages: Higher energy efficiency and endless hot water supply. Tankless units are also more compact.
  • Disadvantages: Higher upfront costs and potential limitations on simultaneous water usage in large homes.

3) Hybrid Water Heaters

Hybrid water heaters combine the features of tank and tankless systems to optimize energy use and hot water supply.

  • Operation: These systems use a heat pump to extract heat from the surrounding air and transfer it to the water. A backup heating element is used for high-demand periods.
  • Advantages: Extremely energy-efficient and environmentally friendly, with lower operating costs over time.
  • Disadvantages: Larger initial investment and requires more space for installation.

Why Do Hot Water Heaters Fail?

Hot water heaters are built to last, but they can fail due to various reasons. Here are some common causes:

1) Sediment Buildup

Over time, minerals from hard water settle at the bottom of the tank, forming sediment. This buildup can insulate the heating element or burner, reducing efficiency and causing overheating.

  • Prevention: Regular flushing of the tank can prevent sediment accumulation.
  • Signs of Failure: Rumbling noises, reduced hot water supply, and increased energy bills.

2) Corrosion

Despite protective linings and anode rods, tanks can eventually corrode. Corrosion leads to leaks and structural failure, often requiring a complete replacement of the unit.

  • Prevention: Replacing the anode rod every 3-5 years can significantly extend the lifespan of the tank.
  • Signs of Failure: Rust-colored water or visible leaks around the tank.

3) Thermostat Issues

A malfunctioning thermostat can result in water that’s either too hot or not hot enough.

  • Prevention: Regular maintenance checks ensure the thermostat is calibrated and functioning correctly.
  • Signs of Failure: Inconsistent water temperature.

4) Pressure Relief Valve Failure

If the pressure relief valve is faulty, it may fail to release excess pressure, leading to a dangerous situation.

  • Prevention: Test the valve annually to ensure it works properly.
  • Signs of Failure: Dripping water or visible damage to the valve.

5) Aging Equipment

Most water heaters have a lifespan of 10-15 years. Beyond this, efficiency decreases, and the risk of failure increases.

  • Prevention: Plan for a replacement as the unit nears the end of its expected lifespan.
  • Signs of Failure: Frequent repairs, rising energy bills, and inadequate hot water.

Conclusion

Understanding how a water heater works and maintaining its components can ensure a reliable hot water supply and extend its lifespan. From point-of-use units to hybrid systems, each type has its advantages and considerations. Regular maintenance, such as flushing the tank and replacing the anode rod, can prevent common issues like sediment buildup and corrosion.

Whether you’re selecting a new water heater or troubleshooting an existing one, staying informed will help you make better decisions for your household needs.

FAQs

How often should I flush my water heater?

It’s recommended to flush your water heater once a year to prevent sediment buildup and maintain efficiency.

What temperature should I set my water heater to?

The optimal temperature is 120°F. This setting balances energy efficiency and safety while reducing the risk of scalding.

Can I install a water heater myself?

While it’s possible to install a water heater yourself, professional installation is recommended to ensure safety and compliance with local codes.

How do I know if my water heater needs replacing?

Signs include frequent repairs, rust-colored water, and an inability to meet your household’s hot water needs.

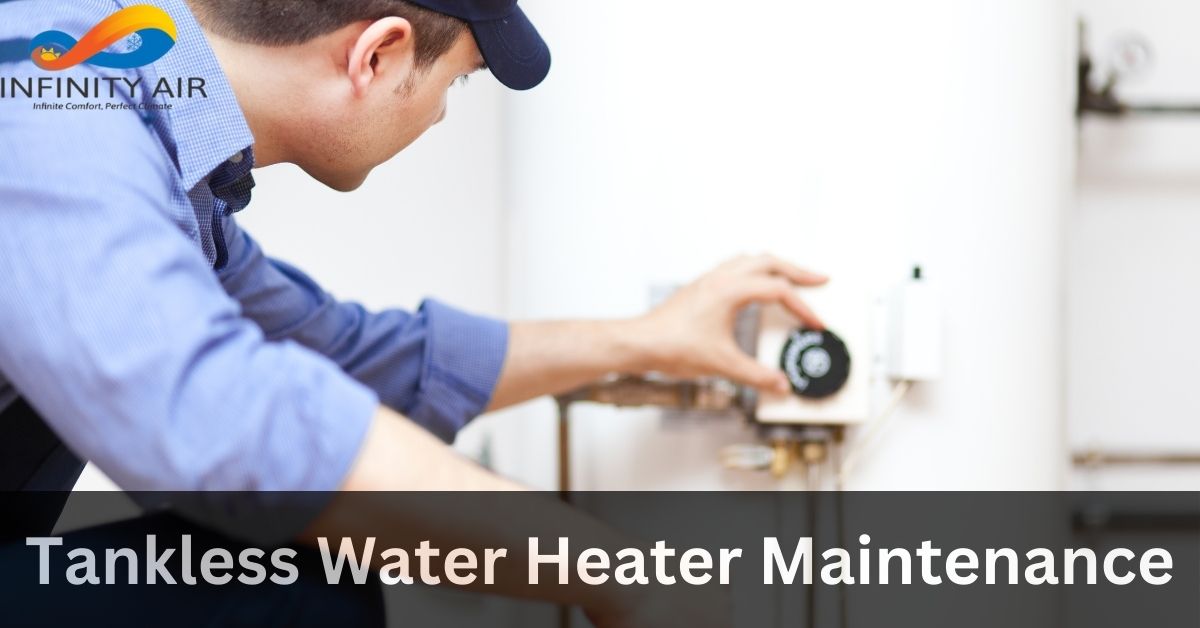
7 Essential Tips for Tankless Water Heater Maintenance

Tankless water heaters, often called on-demand water heaters, are energy-efficient and provide hot water only when needed. Unlike traditional water heaters, they don’t store hot water but heat it as it flows through the system. However, their efficiency and longevity depend heavily on regular maintenance. Without proper care, mineral build-up, corrosion, or mechanical wear can reduce performance and lead to costly repairs. In this guide, we’ll walk you through essential maintenance steps to ensure your tankless water heater remains efficient and reliable.

Steps for Maintaining a Tankless Water Heater

1. Power Down the Unit

Before beginning any maintenance tasks, safety comes first. Turn off the energy source to the water heater, whether it runs on electricity or gas. For electric models, switch off the circuit breaker, and for gas models, shut off the gas valve. This step is crucial to prevent accidents while handling the unit.

Taking these precautions protects you from electrical shocks or gas leaks. Experts recommend waiting a few minutes after powering down to allow the unit to cool slightly if it’s been recently in use.

2. Shut Off All Water Valves

To avoid water flowing through the system during maintenance, close all the main water valves connected to the heater. These typically include the cold water supply and the hot water outlet valves.

This step is essential to isolate the system and prevent leaks or water damage. Closing the valves ensures the descaling solution effectively cleans the unit without interference from incoming or outgoing water.

3. Remove Purge Port Valve Caps

Your tankless water heater is equipped with purge port valves, which are essential for flushing and descaling. Carefully remove the caps on these valves, which are often located on the service ports of the unit. Be prepared for a slight release of water pressure when removing the caps.

To minimize mess, use a towel or bucket to catch any water that might drip. Removing these caps is a vital step to prepare the system for thorough cleaning and to ensure effective descaling.

4. Connect Hoses to the Service Valves

Attach hoses to the hot and cold water service valves to allow for the descaling solution to circulate. Most tankless water heater maintenance kits include these hoses. Ensure the hoses are securely connected to prevent leaks.

Using the correct hoses and following the manufacturer’s instructions is essential for efficient cleaning. The hoses act as conduits, allowing the cleaning solution to flow through the heater without spillage.

5. Open the Service Valves

With the hoses in place, open the purge port valves to create a flow path for the descaling solution. This step allows the solution to circulate through the heat exchanger, breaking down mineral deposits.

Mineral build-up, especially calcium and magnesium, is common in areas with hard water. Regular flushing helps prevent blockages, ensuring the heater operates efficiently. Experts recommend using a vinegar or manufacturer-approved descaling solution.

6. Descale the System

Once the service valves are open, circulate the descaling solution through the unit using a submersible pump. Let the solution run through the system for at least 45 minutes to an hour. This process dissolves mineral deposits and scale that can hinder performance.

Regular descaling ensures consistent water flow and optimal heating efficiency. According to industry statistics, descaling can improve a unit’s energy efficiency by up to 15%, especially in areas with hard water.

7. Flush and Drain the Unit

After descaling, it’s essential to flush the system with clean water to remove any remaining solution. Close the purge port valves and carefully disconnect the hoses. Reattach the purge caps and open the main water valves to flush out residual cleaner. Finally, drain any excess water from the unit.

Proper flushing prevents the build-up of cleaning chemicals, which could harm the heater’s components or affect water quality. Once completed, restore the power supply, and your heater is ready to use.

Benefits of Maintaining a Tankless Water Heater

1. Enhanced Efficiency

A well-maintained tankless water heater operates more efficiently, reducing energy consumption. According to the U.S. Department of Energy, tankless units are 24-34% more energy-efficient than conventional storage water heaters for households using 41 gallons or less daily.

2. Prolonged Lifespan

Routine maintenance prevents wear and tear, extending the lifespan of your heater. A properly maintained unit can last over 20 years, compared to 10-15 years for poorly maintained models.

3. Cost Savings

By avoiding repairs and ensuring energy efficiency, maintenance helps save money in the long run. Regular servicing prevents costly breakdowns and keeps utility bills low.

4. Consistent Hot Water Supply

Maintenance ensures your heater provides an uninterrupted hot water supply, even during peak usage. It prevents common issues like fluctuating temperatures or reduced flow rates.

How Often Should Tankless Water Heaters Be Serviced?

Experts recommend servicing tankless water heaters annually for optimal performance. However, the frequency may vary based on factors like water hardness and usage. In areas with hard water, descaling every six months might be necessary to prevent mineral accumulation. Regular servicing ensures:

  • Improved energy efficiency
  • Longer equipment lifespan
  • Consistent water temperature

Neglecting maintenance can lead to decreased performance, higher energy bills, and potential damage to internal components. Scheduling professional inspections alongside DIY maintenance can catch minor issues before they escalate.

Conclusion

Maintaining a tankless water heater is not only essential for efficiency but also for its longevity. By following these steps and servicing your unit regularly, you can enjoy consistent hot water while keeping energy costs in check. Routine care ensures your heater operates at its best, providing peace of mind and value for your investment.

FAQs

Can I maintain a tankless water heater myself?

Yes, many maintenance tasks, like descaling and flushing, can be done DIY using manufacturer instructions. However, professional inspections are recommended annually.

What happens if I don’t descale my tankless water heater?

Neglecting descaling can lead to mineral build-up, reducing efficiency, increasing energy costs, and causing damage to internal components.

Is maintenance different for gas and electric tankless water heaters?

While the basic maintenance steps are similar, gas heaters may require additional tasks like cleaning the burners or checking vent systems.

How do I know if my tankless water heater needs maintenance?

Signs include fluctuating water temperatures, reduced flow rates, unusual noises, or error codes displayed on the unit.

What’s the average cost of professional tankless water heater maintenance?

Professional servicing typically costs $150-$300, depending on the service provider and complexity of the job.

Why Is My AC Leaking Water and How to Fix it?

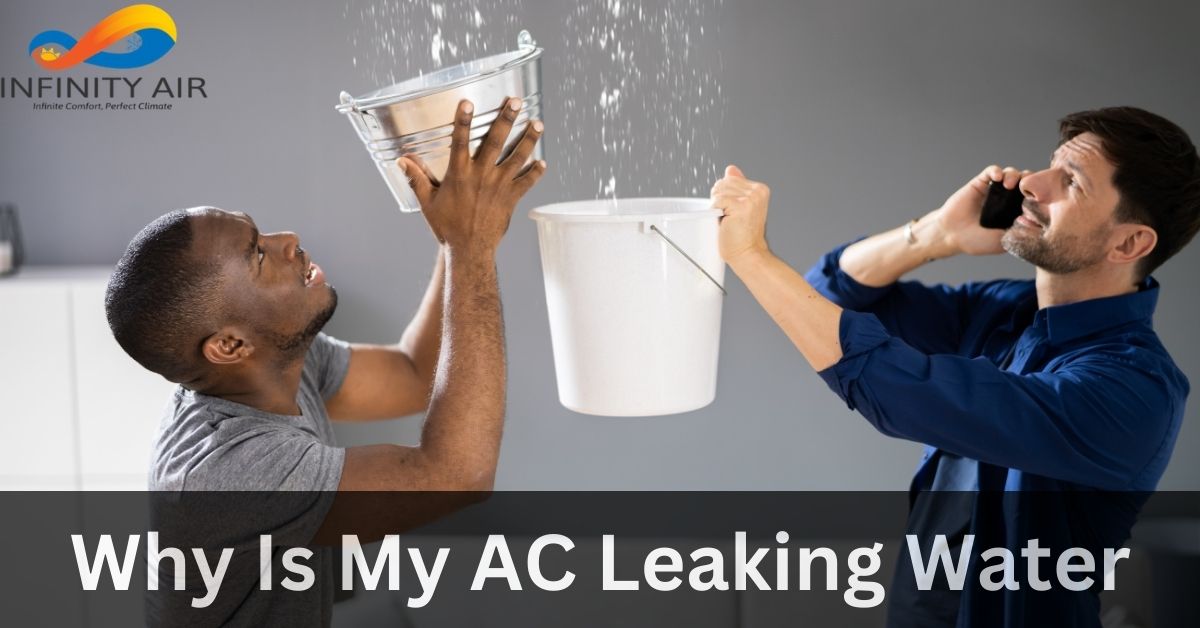
Air conditioners are an essential part of our comfort, especially during hot and humid seasons. However, one of the most common problems homeowners face is a leaking air conditioner. Water leakage from your AC can cause property damage, lead to mold growth, and affect the unit’s performance. If you’ve noticed puddles forming near your unit or dripping water, it’s vital to address the issue promptly.

This blog will discuss the most common causes of air conditioner leaks, how to prevent them, and provide answers to frequently asked questions. Understanding the root causes can save you time, money, and a lot of frustration.

Causes of Leaking Air Conditioners

1) Full or Damaged Drain Pan

The drain pan is designed to collect water that condenses on your AC’s evaporator coil. Over time, this pan can corrode, crack, or simply overflow if it’s not emptied regularly.

  • Old or Rusted Drain Pan: Older units often have metal drain pans that rust over time, creating holes that let water escape. Even plastic drain pans can degrade, leading to leaks.
  • Overflowing Pan: If the drain pan is full and not draining properly, water will spill out. This is common during high humidity or when the AC runs for extended periods.

Expert Tip: Regularly inspect the drain pan for wear and tear. If damaged, replace it promptly to avoid water leaks and further complications.

2) Not Enough Refrigerant

Low refrigerant levels can reduce the pressure inside your air conditioning system, causing the evaporator coil to freeze. When the ice melts, it can lead to excessive water dripping from your unit.

  • Symptoms of Low Refrigerant: Warm air blowing from the vents, a hissing noise, or increased energy bills could indicate insufficient refrigerant levels.
  • Impact: Refrigerant issues not only lead to leaks but can also damage the compressor, a costly component to replace.

Expert Tip: Always have a licensed HVAC technician check your refrigerant levels and address leaks in the refrigerant lines promptly.

3) Clogged Condensate Drain Line

The condensate drain line removes water collected by your AC. Over time, this line can become clogged with dirt, mold, and algae, causing water to back up and leak from the unit.

  • Signs of a Clog: Water pooling around the indoor unit, musty odors, or visible water stains on walls and ceilings can indicate a blockage.
  • DIY Fix: You can use a wet/dry vacuum to clear minor clogs, but persistent issues may require professional cleaning.

Expert Tip: Install a float switch in the drain line to shut off the AC if a clog is detected, preventing water damage.

4) Frozen Evaporator Coil

The evaporator coil cools the air inside your home, but it can freeze if there’s poor airflow or a malfunction. When the ice melts, it creates an excessive amount of water.

  • Causes of Freezing: Dirty air filters, blocked vents, or low refrigerant levels are common culprits.
  • Consequences: If left unchecked, a frozen coil can cause significant damage to the AC system.

Expert Tip: Turn off the AC immediately if you notice ice buildup. Let it thaw completely before running it again, and address the underlying issue.

5) Incorrect AC Installation

Improper installation is a frequent cause of water leaks. If the AC unit isn’t leveled correctly, the water can’t flow into the drain pan and drain line as intended.

  • Common Installation Mistakes: Poor alignment of the unit, incorrect placement of the drain line, or failure to seal connections properly.
  • Impact: Water leakage and reduced efficiency can result from such errors.

Expert Tip: Always hire certified HVAC professionals to install your AC to ensure proper setup and avoid long-term problems.

6) Dirty Air Filter

A clogged air filter restricts airflow, which can cause the evaporator coil to freeze. As the ice melts, water may overwhelm the drain pan and leak from the unit.

  • Signs of a Dirty Filter: Reduced cooling efficiency, increased energy bills, and unusual noises from the unit.
  • Maintenance: Air filters should be replaced every 1-3 months, depending on usage and air quality.

Expert Tip: Regular filter replacement not only prevents leaks but also extends the lifespan of your AC and improves indoor air quality.

7) High Humidity Levels

Excessive humidity in your home can overburden your AC’s dehumidification process, causing the system to collect more water than it can handle.

  • Impact: An overwhelmed system can lead to water leakage and strain on the components.
  • Solution: Use a dehumidifier in conjunction with your AC to manage humidity levels effectively.

Expert Tip: Keep humidity levels below 60% to optimize your AC’s performance and prevent leaks.

8) Broken Condensate Pump

If your AC unit is located in the basement or a low area, it may rely on a condensate pump to remove water. A malfunctioning pump can lead to water buildup and leaks.

  • Signs of a Faulty Pump: Frequent leaks, strange noises, or no water exiting the drain line.
  • Fix: Replace or repair the pump to restore proper water drainage.

Expert Tip: Test the condensate pump periodically to ensure it’s working correctly.

How to Prevent a Leaking Air Conditioner?

  • Regular Maintenance: Schedule annual AC tune-ups with a licensed technician to inspect and clean all components, including the drain line and evaporator coil.
  • Replace Filters Frequently: Keep air filters clean to ensure proper airflow and reduce strain on the system.
  • Check the Drain Line: Flush the condensate drain line with vinegar or a specialized cleaner every few months to prevent clogs.
  • Ensure Proper Installation: Work with experienced professionals to install your AC correctly.
  • Monitor Humidity Levels: Use a dehumidifier in high-humidity areas to reduce the load on your AC.
  • Inspect the Drain Pan: Check for cracks or corrosion regularly and replace the drain pan if necessary.

FAQs

Why is my AC leaking only when it’s hot outside? 

High outdoor temperatures can cause your AC to work harder, producing more condensate. If the drain line or pan is unable to handle the excess water, it may leak.

Can I use my AC while it’s leaking? 

It’s best to turn off the unit and address the issue immediately to prevent further damage to the system or your property.

How much water should an AC produce daily?

Depending on the humidity, an AC can produce 5-20 gallons of water per day. Excessive leakage indicates a problem that needs attention.

Can a leaking AC cause mold growth? 

Yes, stagnant water from a leaking AC can promote mold and mildew growth, posing health risks and damaging your home.

Why Is My AC Not Blowing Cold Air? Common Causes Explained

When your air conditioner stops blowing cold air, it can quickly turn your home into an uncomfortable place. While AC issues are frustrating, they are not uncommon. Understanding the root causes can save you from unnecessary stress and repair costs. In this blog, we will explore the most common reasons your AC might not be cooling effectively and provide expert insights to help you address the problem.

Why Is My AC Not Blowing Cold Air?

Your AC’s cooling problem can stem from several issues, ranging from simple maintenance oversights to more complex system failures. Below, we break down nine common causes and how to resolve them.

1) Dirty Filters

Air filters trap dust, pollen, and other particles, ensuring clean airflow. When filters are clogged, airflow is restricted, causing cooling inefficiencies.

  • Impact of Dirty Filters: Restricted airflow forces the system to work harder, potentially freezing the evaporator coil.
  • Solution: Inspect and replace your filters monthly, especially during peak summer months.

Pro Tip: Homes with pets or in dusty environments may need more frequent filter changes to maintain optimal cooling.

2) Leaking or Low Refrigerant

Refrigerant is the lifeblood of your air conditioning system. It’s responsible for absorbing and expelling heat, allowing your AC to cool the air effectively.

  • Signs of Low Refrigerant: Reduced cooling efficiency, longer cooling cycles, or ice formation on the evaporator coil.
  • The Cause: Leaks in the refrigerant lines are the primary culprit. Aging systems or accidental damage can exacerbate the issue.
  • Solution: Call a licensed HVAC technician to locate and repair leaks. Refilling refrigerant without addressing the leak is a temporary fix and may violate environmental regulations.

Expert Insight: According to the U.S. Department of Energy, refrigerant leaks can reduce your system’s efficiency by up to 20%, leading to higher energy bills.

3) Problems With the Condenser or Evaporator Coil

The condenser coil expels heat outside, while the evaporator coil absorbs heat from inside your home. Dirty or damaged coils hinder this process.

  • Common Issues: Dirt accumulation, bent fins, or corrosion on the coils.
  • Maintenance Tips: Clean the condenser coils at least once a year. Use a coil cleaner spray and a soft brush for safe cleaning.
  • Expert Repair: Severe damage or corrosion may require coil replacement by a professional.

Did You Know? A dirty condenser coil can increase energy consumption by 30%, according to industry studies.

4) A Faulty or Wrongly Calibrated Thermostat

The thermostat acts as the command center for your cooling system. Calibration or technical issues can disrupt its operation.

  • Common Problems: Incorrect temperature readings, failing to trigger cooling cycles.
  • Fixes: Replace batteries, recalibrate settings, or upgrade to a smart thermostat for better accuracy and control.

Smart Tip: Smart thermostats can save homeowners up to 10% annually on cooling costs.

5) Ducts Are Leaking

Leaky ductwork allows cool air to escape before it reaches your living spaces, significantly reducing efficiency.

  • Indicators: Uneven cooling, higher utility bills, or visible duct damage.
  • Fixing Leaks: Seal duct gaps with mastic sealant or metal tape. Larger issues may require a professional inspection.

Stat Alert: The U.S. Environmental Protection Agency estimates that leaky ducts can cause up to 30% of energy loss in cooling systems.

6) Tripping Circuit Breaker

If your AC’s circuit breaker trips frequently, it could indicate electrical issues or an overloaded system.

  • Potential Causes: Dirty air filters, malfunctioning motors, or electrical faults.
  • Solution: Reset the breaker and check for recurring trips. Persistent issues require a professional electrician or HVAC technician to assess the system.

Safety Note: Avoid repeatedly resetting a tripping breaker, as it can damage the system or pose fire hazards.

7) Wrong Size for Your Home

An undersized AC struggles to cool your space, while an oversized unit cycles on and off too quickly, failing to dehumidify properly.

  • Impact of Improper Sizing: Reduced comfort, higher energy bills, and faster wear and tear.
  • Solution: Consult an HVAC professional to perform a load calculation and determine the correct unit size for your home.

Fact: Properly sized AC systems improve energy efficiency by up to 15%, according to ENERGY STAR guidelines.

8) Clogged or Blocked Registers

Blocked registers restrict airflow, preventing cool air from circulating effectively.

  • What to Check: Ensure furniture, curtains, or debris aren’t obstructing vents.
  • Solution: Clean registers regularly and rearrange furniture to improve airflow.

Pro Insight: Even partially blocked registers can reduce cooling efficiency by 25% or more.

9) A Malfunctioning Compressor

The compressor is the engine of your AC system, responsible for circulating refrigerant. When it fails, cooling stops entirely.

  • Warning Signs: Unusual noises, reduced cooling, or a complete lack of cold air.
  • Solution: Diagnosing a compressor issue requires professional expertise. Repairs can be costly, but replacement is sometimes a more cost-effective option for older systems.

Expert Advice: Regular maintenance can extend compressor life, avoiding premature replacements.

Conclusion

An AC not blowing cold air can result from various issues, ranging from simple maintenance tasks to complex repairs. Regular upkeep, such as cleaning filters and inspecting ducts, can prevent many of these problems. For more serious issues like refrigerant leaks or compressor malfunctions, professional intervention is essential. By addressing these common causes, you can restore your home’s comfort and extend the life of your air conditioning system.

FAQs

How often should I replace my AC filters? 

Replace filters every 1-3 months, depending on usage and environmental factors like pets or dust.

Can I fix a refrigerant leak myself? 

No, refrigerant handling requires specialized equipment and certifications. Always hire a licensed HVAC technician.

Why does my AC cool some rooms but not others? 

This may indicate leaky ducts, blocked registers, or an improperly sized system. A professional inspection is recommended.

Is it worth repairing an old AC unit?

If your system is over 10-15 years old, replacing it with a more energy-efficient model may be more cost-effective in the long run.

How can I improve my AC’s energy efficiency?

Regular maintenance, sealing ducts, and upgrading to a programmable thermostat are effective ways to enhance efficiency.

Copyright © 2025 Infinityairnova All Rights Reserved.